

Most people who ask me how to maintain fermenters are really asking why their kit stopped working in month three. The lids still screw on. The weights are still in the drawer. But the airlock has gone quiet, the gasket smells like the inside of a fridge that lost power, and the glass wears a chalky film that dish soap will not take off. Learning how to maintain fermenters is the least glamorous skill in this hobby and the one that decides whether you buy one good vessel or four cheap ones.
I keep three shapes in rotation in my Portland kitchen: wide-mouth mason jars for starter and small vegetable ferments, a stoneware crock for long cabbage and kimchi runs, and big glass jugs for the mead my neighbour and I put up each autumn. Different materials, same three failure points. Gaskets go chalky, glazed rims chip, and glass cracks at the shoulder when it goes from hot wash water onto a cold counter.
This is not a buying guide in disguise. It is the routine I actually run, applied to the three vessels I run it on, with the flaws I would want named if I were reading someone else's notes.
Why you should trust me
I have baked two loaves a week since 2016 and sold forty a weekend out of a shared commercial kitchen from 2019 to 2021, and the same starter has survived two apartment moves and one four-day power outage. Starter care is jar care. When you feed a starter twice a day for nine years, you learn which lids drop their gasket into the sink, which jars crack at the shoulder after a winter of hot washes, and which kits arrive with weights too small to hold a cabbage leaf under the brine.
I have also kept a crock of sauerkraut going most winters and put up mead in glass jugs since 2018, so all three shapes below are vessels I have washed a few hundred times. I am not going to claim a lab test or a panel of testers. This is a maintenance write-up built on my own bench, my own bake log, and what the listings and the repeated complaints in fermenters reviews actually say about materials.
How I picked and how I tested
I picked for maintainability, not for the first week. A vessel that is wonderful on day one and impossible to clean on day thirty is decoration, and my rule is that any fermentation tool has to survive either a 500°F oven or a twenty-four hour cold retard. Very few do, and the ones that do are worth naming.
What I looked at, in order: the material and thickness of the glass or the glaze, whether the gasket comes out of the lid, whether the weight sits below the brine line in a full jar, and whether the airlock is a two-piece unit I can rinse or a one-piece lock that traps pulp in the crook. I read a listing the way I read a dough, looking for what the material says about heat and moisture and what the reviews repeat about failure.
I also weighed how much cleaning each one creates. Four lids and four weights means four gaskets to scrub, and that arithmetic matters more than people expect. This is the same reason I tell beginners to learn one vessel before buying a second, which is the short version of how to choose fermenters without wasting money. Most fermenters buying guide copy stops at capacity and ignores the wear parts entirely, which is backwards. The shortlist below survived that filter. The shapes that did not survive it are in the competition section with the reason stated.
If you are still deciding between a jar and a crock, my starter jar and crock comparison walks through the volume math.
The mason jar kit: 4 Sets Fermentation Kit, 32oz Mason Jar Lids Glass Weight Airlock
The mason jar kit
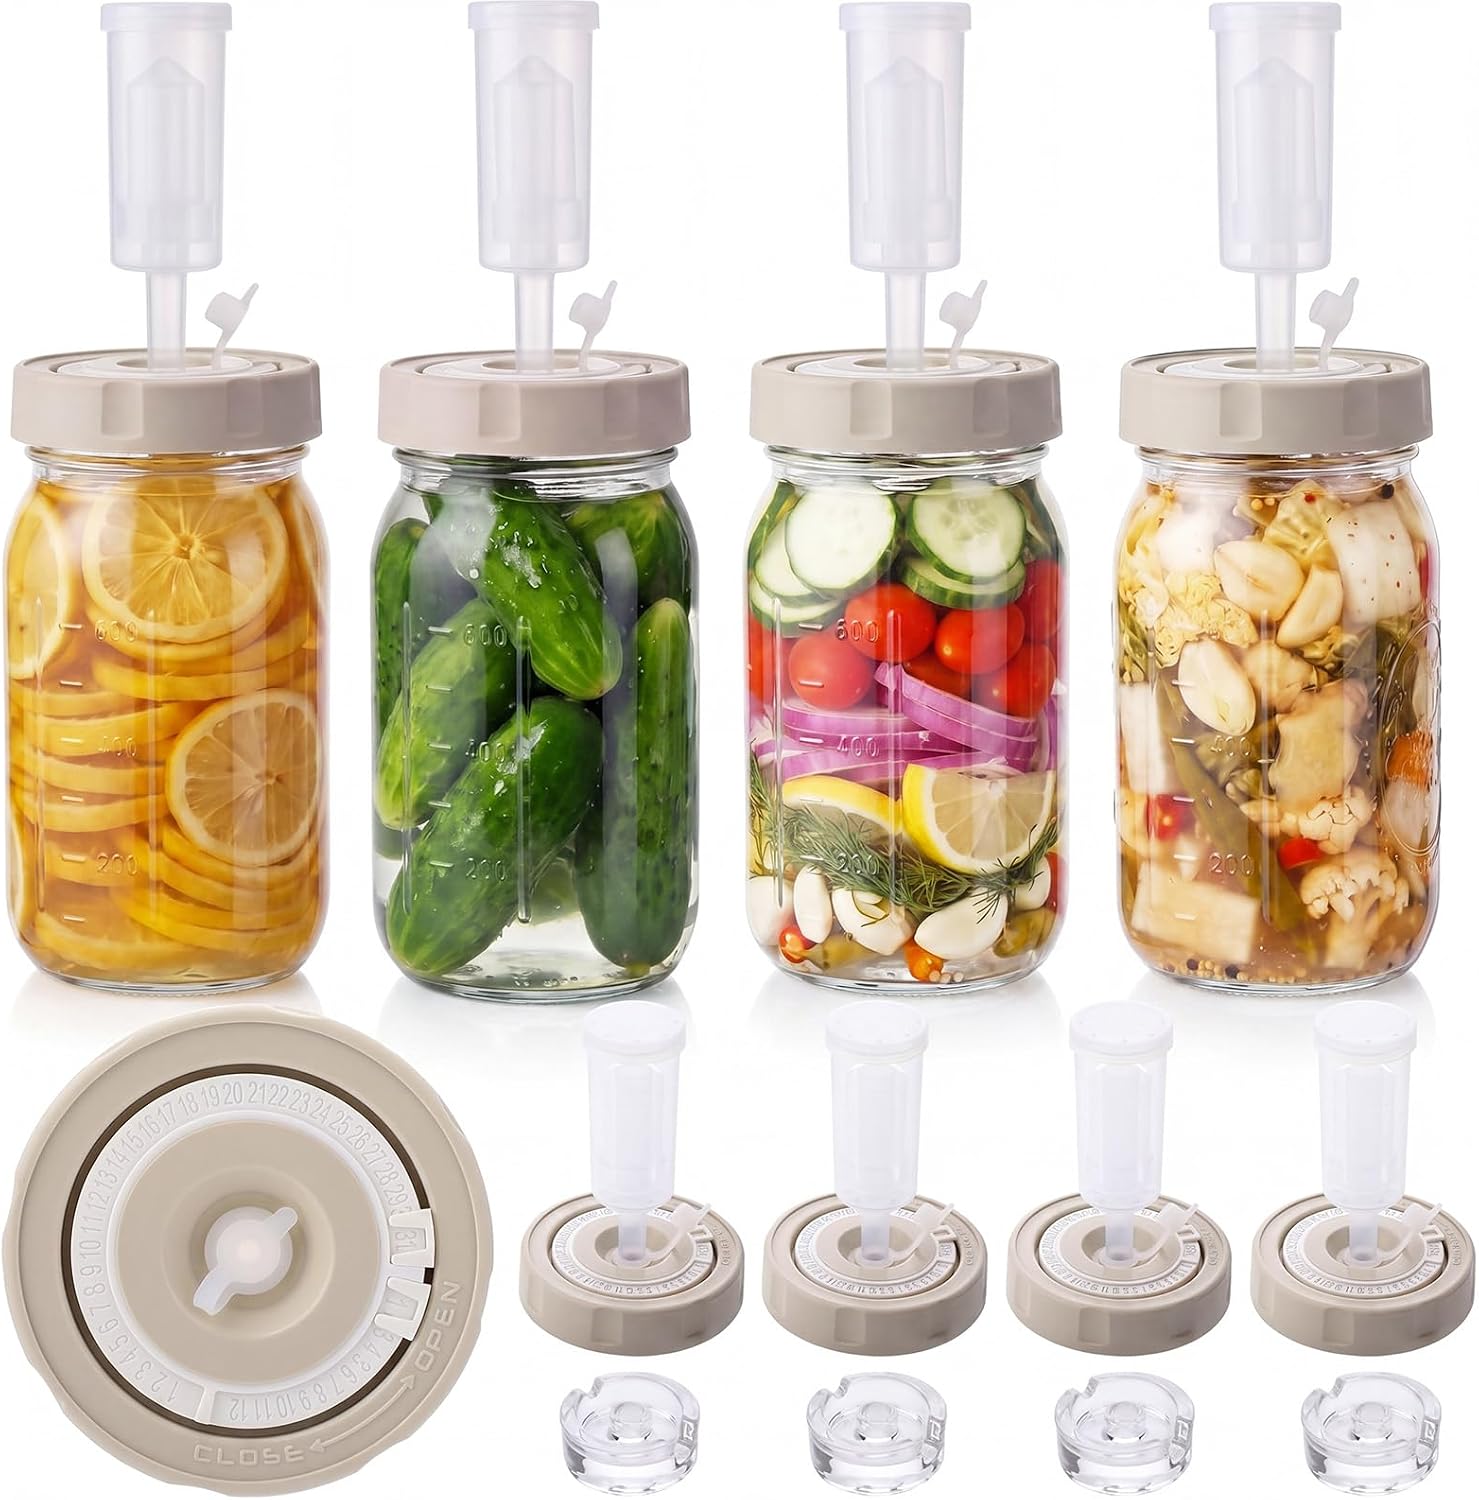
4 Sets Fermentation Kit, 32oz Mason Jar Lids Glass Weight Airlock
Four complete sets for 32-ounce wide-mouth jars: a lid, a glass weight, and an airlock. This is the shape I hand to anyone learning how to maintain fermenters, because everything comes apart. The lid separates from the gasket, the airlock is a two-piece unit, and the weight is glass, so you can hold it up to the window and look for a chip before it goes back in the jar. Check current Amazon price.
The routine for this kit is four parts and about ninety seconds. Pull the gasket out of the lid, rinse it under warm water, and let it dry separately, because a gasket left seated in a wet lid is exactly where the sour smell starts. Run a thumb around the rim of each glass weight; a nicked weight is a weight you throw out, not one you sand. Empty and refill the airlock with fresh water every week, and never let the level fall below the bottom of the stem, because that is the moment the seal reverses and you pull air into the jar instead of pushing it out.
Flaws but not dealbreakers: the gaskets are the wear part. Expect them to go chalky inside a season of steady use, and expect to buy replacements. The weights are also sized for wide-mouth jars, so they will drop straight through the shoulder of a regular-mouth jar and sit on the bottom doing nothing.
For fermenters for beginners this is the right first purchase, and probably the best budget route into vegetable ferments without committing to stoneware.
The stoneware crock: Fermentation Crock Jar 2 Liter/0.5 Gallon – Stoneware Pot for Fermenting, Pickling Kimchi, Pickles, Vegetables, Kombucha – Glazed Fermenter with Stone Weights, Lid
The stoneware crock
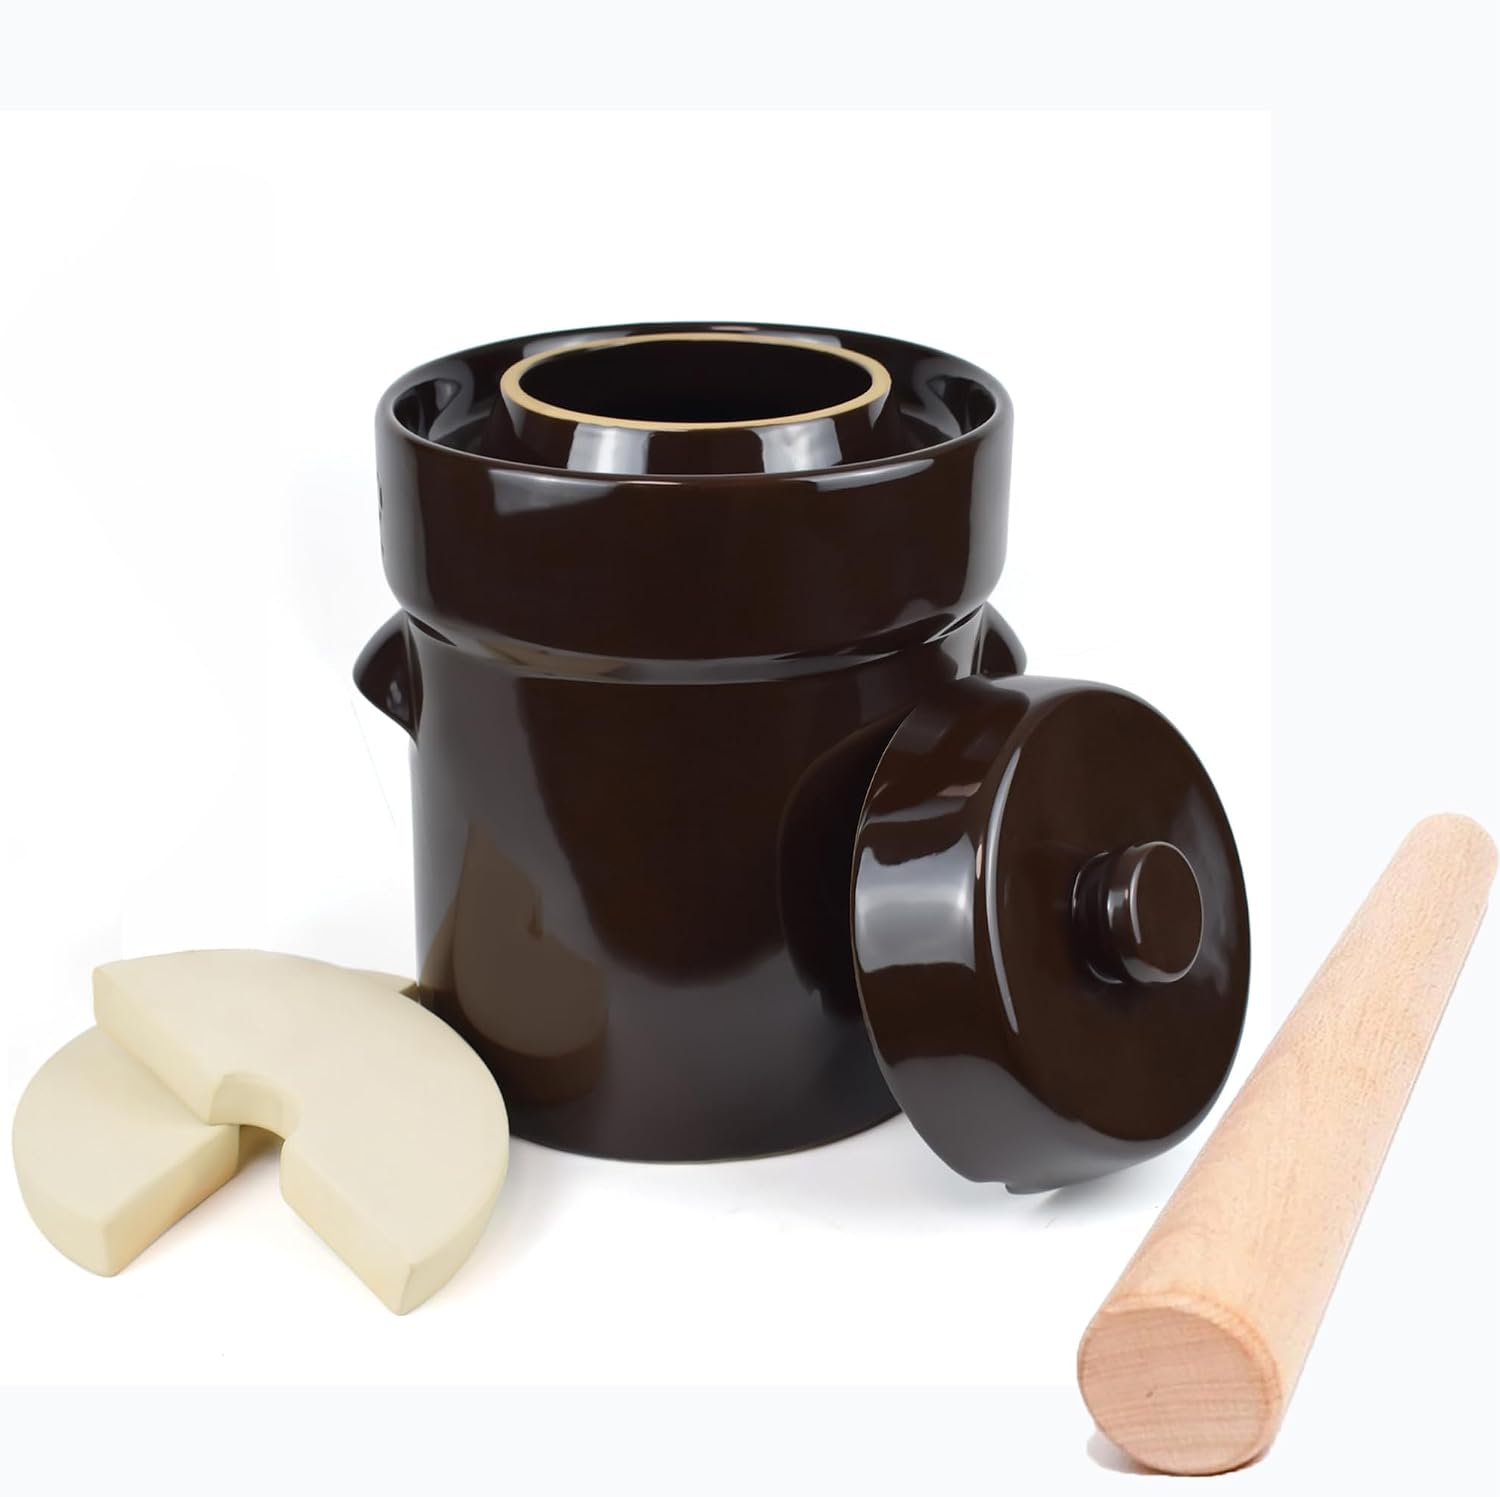
Fermentation Crock Jar 2 Liter/0.5 Gallon – Stoneware Pot for Fermenting, Pickling Kimchi, Pickles, Vegetables, Kombucha – Glazed Fermenter with Stone Weights, Lid
Half a gallon of shredded cabbage is a lot of mason jars, and this is the vessel that ends that argument. Glazed stoneware, a pair of stone weights, and a lid. Stoneware holds temperature better than thin glass, which matters more than any gadget when the house cools overnight. Check current Amazon price.
Maintenance on a crock is mostly about the glaze and the temperature swing. Wash it with warm water and a soft brush, never a metal scourer, and never move it from a hot wash straight into cold water or the reverse. A glazed pot that goes through thermal shock will craze, and a crazed interior holds brine in the cracks where you cannot reach it. Dry it fully, inside and out, before it goes on the shelf, and store it with the lid off so air can move through it.
The stone weights need the same attention as glass ones. Dry them between uses rather than leaving them damp in the crock, and store them loose so they are not resting on the same spot for months. If a weight develops a crack rather than a chip, retire it, because a split stone can shed grit into a ferment.
Flaws but not dealbreakers: it is heavy, it takes up a shelf, and the two-liter size is a single-batch vessel. You will not run two ferments in it at once.
Anyone who makes kimchi or kraut in quantity and wants the ferment kept dark will get more out of this than out of another four jars.
The carboy cap: Carboy Caps, 4 Pk Silicone Caps for Fermenting in 3/5/6 Gallon Glass Jugs, Homebrew Wine, Beer, Mead
The carboy cap
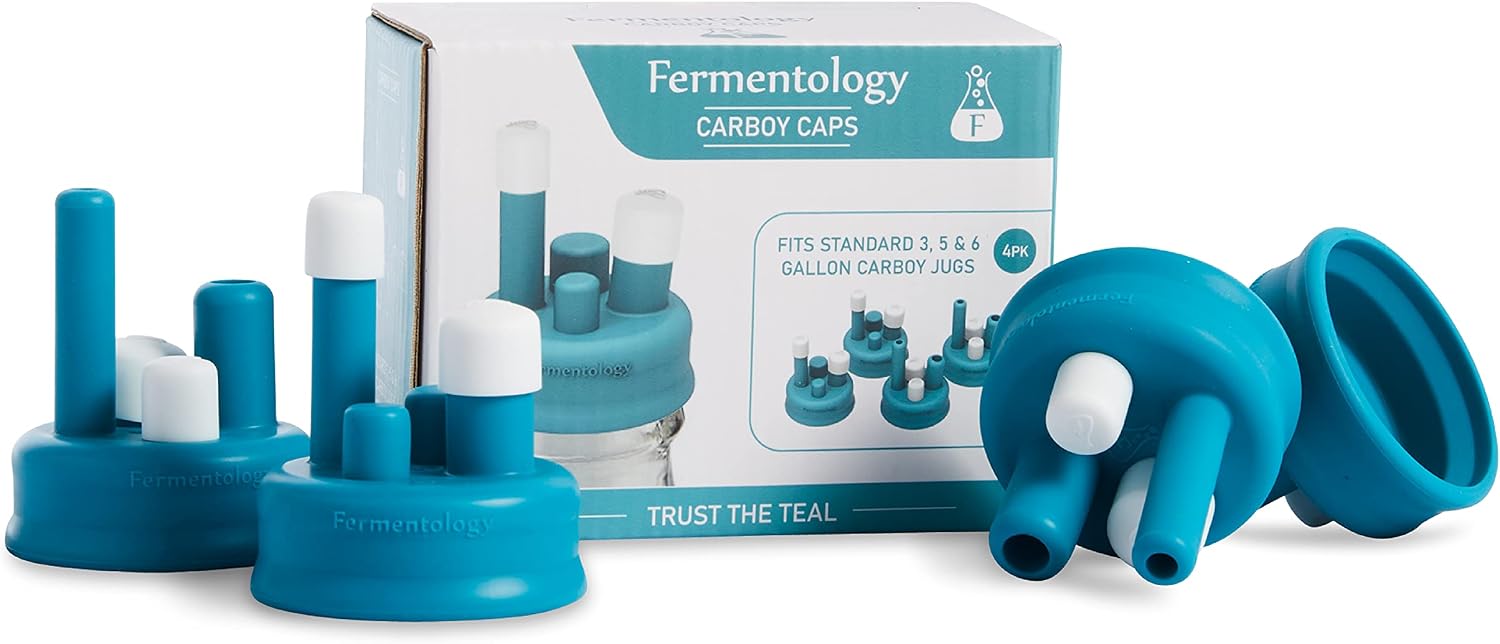
Carboy Caps, 4 Pk Silicone Caps for Fermenting in 3/5/6 Gallon Glass Jugs, Homebrew Wine, Beer, Mead
Four silicone caps sized for three, five, and six gallon glass jugs. If you put up mead or wine, this is the piece that replaces a drilled stopper and a length of tubing, and it is far easier to keep clean because there is no hole to scrub. Silicone tolerates heat better than rubber and it does not go brittle the way a cheap stopper does. Check current Amazon price.
The failure mode here is stretching, not cracking. A silicone cap that has been forced onto the wrong jug throat will stretch and stop seating, and then it lets air in at the exact moment you least want it. Wash with warm water, dry the inside of the cap thoroughly, and store it off the jug rather than capping an empty carboy, because a cap left on an empty jug traps moisture against the glass and against itself.
Check the rim of each cap where it folds over the jug mouth. That fold is where a split starts, and a split cap looks fine from above until you tip the jug. Rotate which cap goes on which jug so no single one takes all the wear.
Flaws but not dealbreakers: they stain. A cap that has spent a season on a dark wine will keep the colour no matter how well you wash it, and staining is cosmetic. The fit is also sized to standard jugs, so an odd or thick-lipped carboy may not seat cleanly.
Homebrewers and mead makers who already own glass jugs will use these more than any other item in this guide.
How to maintain fermenters: the actual workflow
Now the part you came for. This works on glass jars, glazed crocks, and glass carboys alike. If your vessel cannot survive all eight steps, it is the wrong vessel.
Step one: Wash the day you empty it. A jar that sits with brine in it for a week grows a film no brush reaches. Warm water, a drop of unscented soap, a bottle brush for the shoulders, and a full rinse. No dishwasher for anything with a gasket, and never hot water into cold glass. The first thing that fails on a neglected fermenter is not the glass, it is the smell, and the smell is a biofilm you have to scrub out rather than rinse off.
Step two: Take the gasket out of the lid. Every single time. A gasket left seated in a wet ring stays wet, and a wet gasket is where the sour smell lives. Hold it up to the light and look for chalkiness. If it no longer snaps back when you stretch it, it will not hold a seal, and no amount of tightening the ring fixes a gasket that has lost its rebound.
Step three: Dry upside down on a rack, not on a towel. Air moving through an inverted jar does more than any cloth. A towel left inside a carboy is how you grow mould in a vessel you thought was clean. Racks are cheap and they pay for themselves in one season.
Step four: Inspect the glass at the shoulder and the rim. Run a fingernail around both. A hairline catches a nail before it catches your eye, and a jar with a hairline at the shoulder is a jar that fails under a full load of brine. Retire it for dry storage only.
Step five: Reseat the gasket dry and test the seal. Fill the jar with water, cap it, and invert it over the sink for a minute. If a bead of water creeps past the ring, the gasket is either seated crooked or worn out. This test takes less time than cleaning up a leak, and it catches the problem before a ferment is sitting in it.
Step six: Store with the lid off, and write on the jar. The fermenters jar markings on a mason jar are a volume guide, not a fermentation guide, so a strip of tape and a pencil does more than the moulded numbers. Note the date and what went in. When you store the jar, leave the lid loose or off entirely. A sealed empty jar holds humidity and smells like a cellar by the time you need it.
Step seven: Hold the warm spot steady. The top of the fridge is traditional and still fine, but pick one spot and keep it. A vessel that moves between a cold counter and a warm shelf will swing, and swings are what push a ferment too fast on day two and stall it on day six. The same discipline applies to fermenters bulk fermentation schedules and to your fermenters starter feeding ratio: consistency in temperature and timing beats any adjustment you make mid-run.
Step eight: Replace wear parts on a calendar, not on failure. New gaskets once a year. A weight retired the day it chips. An airlock replaced the day it cracks, because a cracked airlock silently stops bubbling. Write the replacement date on the tape next to the ferment date. That single habit is the difference between a kit that lasts three seasons and one that quietly stops working.
The competition and why it lost
The drilled rubber stopper and blow-off tube is the classic homebrew answer and it lost on cleaning. The hole in a stopper is exactly where pulp and dried yeast collect, and a stopper that has gone hard will not seal no matter how carefully you seat it. The silicone cap does the same job with fewer crevices.
Plastic bucket fermenters lost on inspection. You cannot run a fingernail over a bucket and find a hairline, because the material hides scratches, and a scratched bucket holds aroma from the last batch. They are fine for a beer that will be drunk young. They are not what I would keep a starter in.
Vacuum-pump lids lost on parts count. Every extra valve is another gasket and another thing to lose in a drawer. The kits that need a hand pump to seal are the kits whose gaskets fail first, and when they fail you cannot see it because the lid still looks closed.
Unglazed crocks lost on cleaning, plainly. An unglazed interior is a sponge, and a sponge that has held brine for a month cannot be scrubbed back to neutral. The glazed crock above wins that comparison on the glaze alone.
Swing-top bottles lost on maintenance honesty. The wire and the rubber ring are two wear parts, not one, and the ring perishes quietly. For dry goods they are fine. For anything actively fermenting, they are a leak with a decorative clasp.
None of these are bad tools. They are tools for a different job than the one this article covers, and being top rated fermenters on a marketplace list does not change what the material does after thirty washes.
What this all costs
I will not quote figures that move week to week. Every product block above says the same thing for a reason: check current Amazon price, because the number you see today is the only one that matters. What I can give you is the shape of the cost, which is more useful over three seasons than any single receipt.
The purchase is the small number. The wear parts are the recurring one. Gaskets, airlock stems, and the occasional replacement weight add up over a few years, and a kit with a standard, replaceable gasket will outlive a kit with a proprietary one every time. That is the real argument for the jar kit over a sealed lid system, and it is why this fermenters buying guide spends so much space on parts you can buy again.
Divide the purchase by the number of ferments you will actually run. If you make kraut twice a winter, the crock earns its shelf space in a couple of years. If you keep a starter and a jar of pickles going, the four-jar kit is the better division. If you already own glass jugs, the caps are the cheapest way to add a second use to something you have.
The maintenance itself costs almost nothing beyond hot water, a brush, and a drying rack. That is the part of how to maintain fermenters people skip, and it is the part that decides whether the gear in your cupboard is still working in year three.
Your vessels were built to be washed. Let them dry properly and they will keep fermenting long after the box is gone.